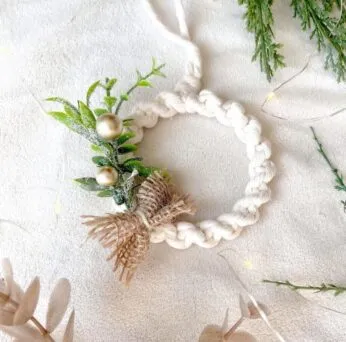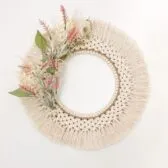
There are many ways to create these adorable easy beginner macrame Christmas ornaments, each with its own unique style! In this post, I’ll show you how to make the half hitch knot version. Be sure to check out my other tutorials for even more styles!
I've sold these ornaments at craft fairs for the past three years, and they’ve consistently been a top seller so this is why I’m excited to teach you how to make them yourself!
supplies and tools to make macrame christmas ornaments
- Macrame cord (3mm or 2mm; single strand, 3-ply, or braided) My favourite brand is Ganxxet as it is the best quality I have ever used, but there are many sellers on Etsy, the best place to buy it. Avoid the stuff at Michaels, you want 100% recycled cotton cord, it makes a difference in the asestetic and quality of your final product. For this ornament, I used braided.
- Metal hoop 2.5 or 3 inches, or any size you prefer. I prefer 3 inches
- Faux Christmas leaves or florals, twine, ribbon
- Measuring tape
- Glue gun
- Scissors
- Wire cutters
- Lastly, craft needle (optional)
steps for making macrame christmas ornaments
step 1: prepare your cord
Cut two pieces of cord to about 80 inches each then line them up evenly, and starting about 8 inches down from one end, temporarily secure them to the metal hoop. This temporary knot will keep the cords in place while you work and will be removed once you finish the wreath.
** For the purpose of these demonstration photos, I am using a larger metal hoop as I do not have any 3 inch hoops on hand at this time!
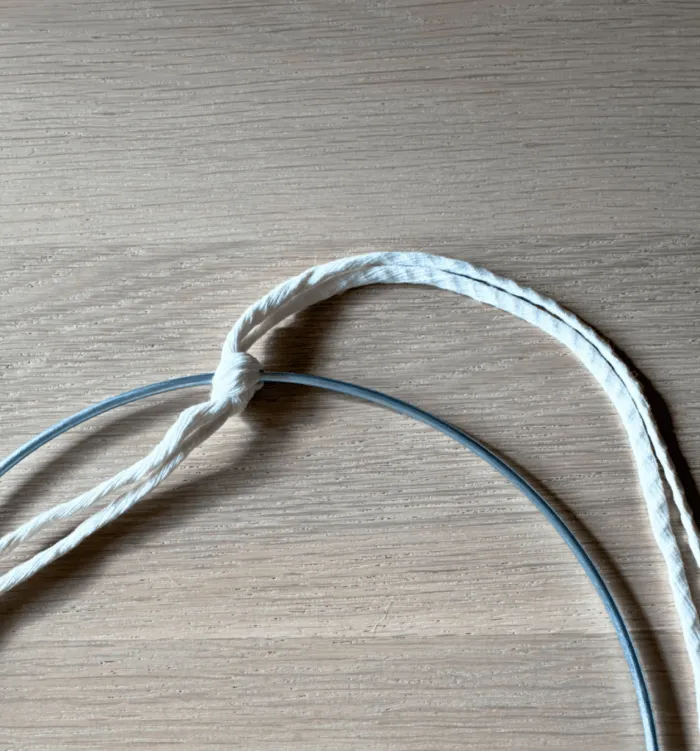
step 2: make the half hitch knot
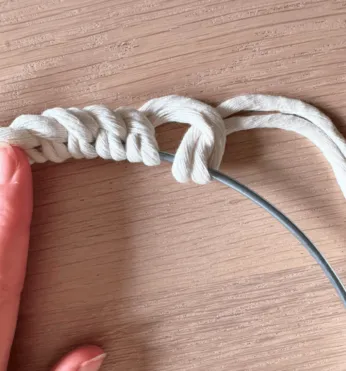
Then create a loop with the cords by positioning them under the metal hoop, leaving a loop above the hoop and the two loose ends hanging below. Bring the loose ends up and back over the hoop, then pass them under and through the loop. Pull the ends down to tighten the knot around the hoop.
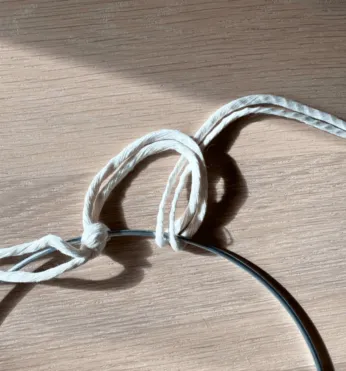
step 3: continue around the metal hoop
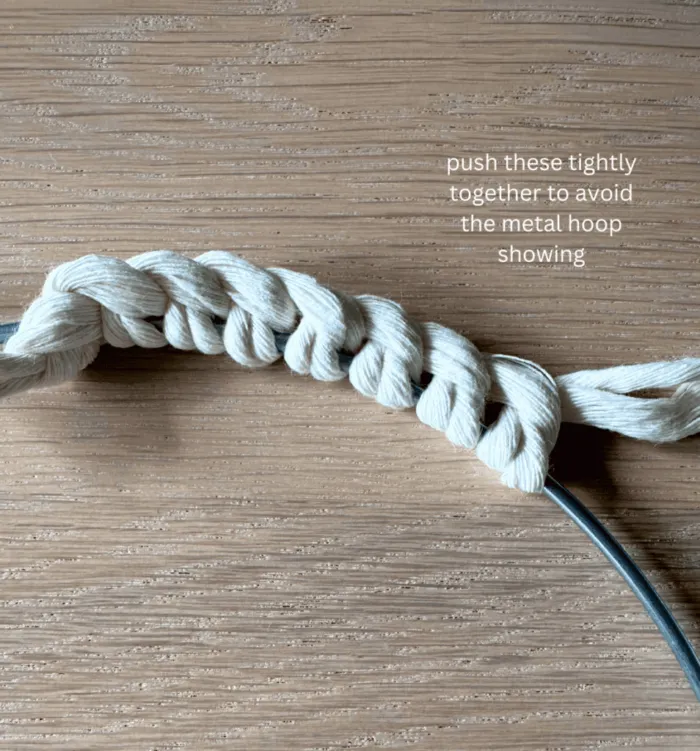
Repeat this process, tying half hitch knots evenly around the hoop until you reach back to your starting point. You do not want to see the metal hoop so as you continue making the loops, push them tight together. It may start to spiral a bit but that is okay, when we get to the end to tie it off, it won't do that anymore.
step 4: tie a square knot
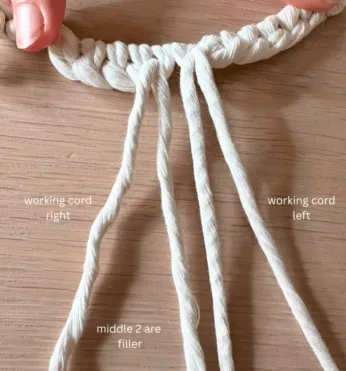
Once you are back to the start and have the entire hoop covered in half hitch knots, you should have four pieces of string meeting together (as shown below in image 1). To secure everything, we are going to use a square knot. The two outer cords are your “working” cords, and the two inner cords are your “filler” cords:
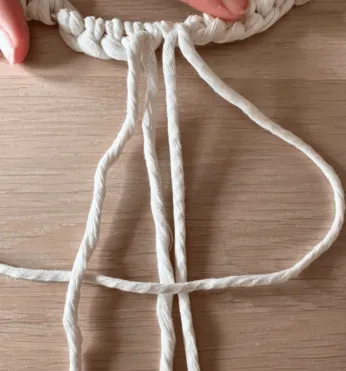
- Cross the right working cord over the filler cords, passing it underneath the left working cord. (second image)
- Then, with the left working cord over the right filler cords, passing it underneath the filler cords and over the right working cord. (third image)
- Lastly, tighten the knot by pulling evenly on both working cords. (fourth image)
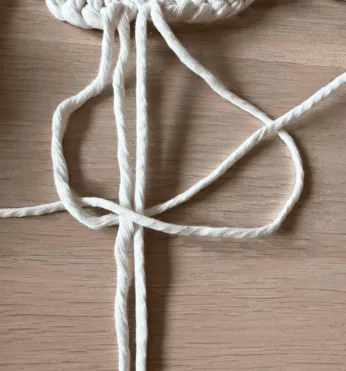
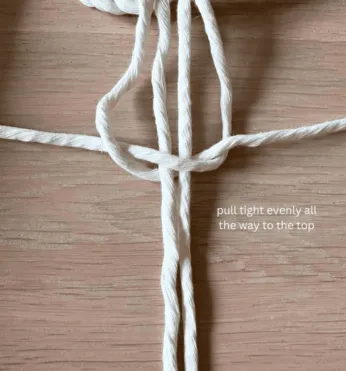
Now you will repeat this in the other direction.
- Cross the left working cord over the filler cords, passing it underneath the right working cord
- Then, with the right working cord over the left filler cords, passing it underneath the filler cords and over the left working cord
- Tighen the knot by pulling evenly on both working cords
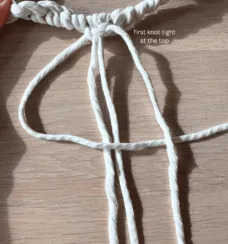
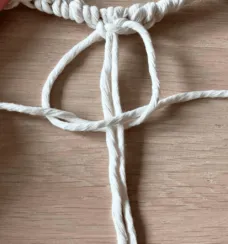
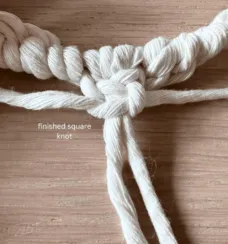
If the square knot is not for you, you could just tie a simple overhead knot. However, I find with this knot pattern it wants to spiral around the metal hoop and I find the square knot prevents it from doing that!
step 5: tuck in the extra cord with a craft needle
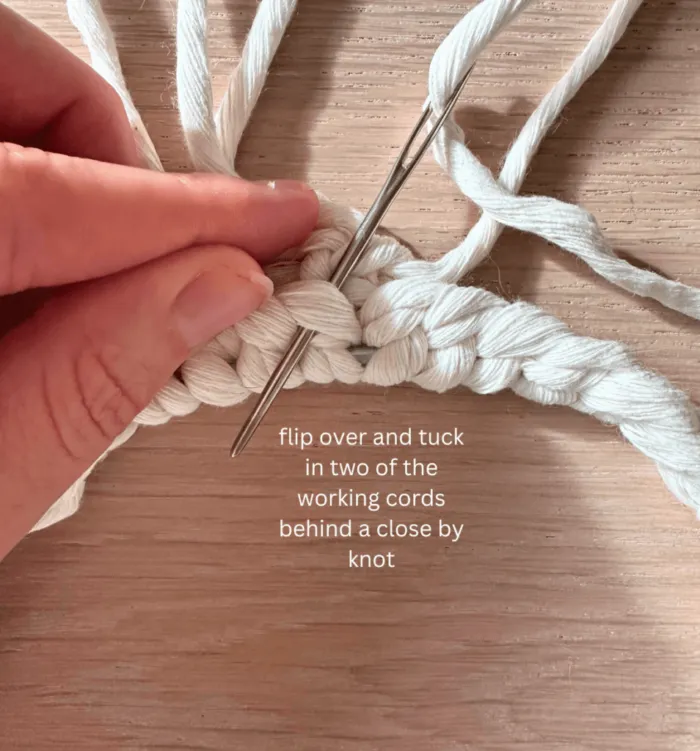
Now that you have everything connected with the square knot, you have 4 strands left. I like to flip my mini wreath over and tuck the two working cords in with a craft needle to a close by knot, then cut it. Tucking it in before cutting will ensure it stays tucked away and give you a clean and polished look. However, you could opt to use a glue gun and just glue them down in the back.
step 6: create your string to hang from the tree
Now, leave about 3.5 inches of space above the wreath and tie an overhand knot with the two remaining cords to form a loop so you can hang your new ornament on the tree.
step 7: add your faux floral accent to finish your macrame christmas ornaments
Now it’s time to decorate! You are going to use small pieces of faux floral or Christmas leaves to add a festive touch. So you will grab a pair of wire cutters to help you trim pieces to the right size, and a glue gun works perfectly for attaching them to the wreath.
Here is a link to a video on my instagram of me attaching the faux floral accent to one of these DIY macrame Christmas ornaments.
I hope you enjoyed this simple ornament DIY! It’s a lovely project for making unique holiday decorations or creating handmade gifts for loved ones so I hope you enjoy making them. For more mini wreath ornament styles, check out my other step-by-step tutorials!
If you enjoyed this tutorial, pin it on Pinterest!

Check out my other blog post tutorial on how to make the spiral knot mini wreath ornaments!
