
Adding a macrame wreath to your home is a beautiful way to bring in texture, warmth, and an organic feel to your decor. Whether you’re dressing up a blank wall, sprucing up your front door, or adding layers to your holiday decorations, this DIY macrame wreath is simple to make for all seasons. This design has consistently been a best seller for me when I was a macrame artist!
Best of all, this is a beginner-friendly macrame wreath craft project because you only need to use two knots throughout the entire process. The larks head knot and the square knot! (Maybe the Soumak weave if you want an accent color). I have made dozens of these and I promise it is a simple pattern! It’s an easy and enjoyable way to dip your toes into macrame without feeling overwhelmed.
This project will take you 2.5-3 hours to make depending on your speed. You will not complete this piece in one sitting. First you will complete the macrame part by tying many knots. Next, you will need to brush/trim your fringe and spray it with fabric stiffener, leaving it to dry for a few hours. From there, you will make your floral arrangement and attach them. I will provide you everything you need to know from where to buy the tools to every little tip and trick to make your macrame wreath look flawless.
Throughout this post, I’ll also share a collection of macrame wreaths I’ve made for inspiration so you can create one that aligns with your style and home aesthetic. Follow this step-by-step guide to create your own!
Supplies & tools You’ll Need to make macrame wreath:
supplies
- Metal hoop - I usually use 7-9 inch hoop. The macrame and fringe will add about 3 inches to each side so depending how big or small you want your wreath will depend on the size you go with. I have made ones with 10 inch hoops as well
- Macrame cord - I recommend 3mm macrame cord or 4mm macrame cord - single strand 100% natural cotton cord (approx. 200 feet)
- Accent color cord (optional) - approx. 120 inches of 3mm or 4mm single strand cord
- Floral elements (eucalyptus, dried flowers, or faux greenery)
- Fabric Stiffener to spray the fringe to hold it in place
- Twine or ribbon (optional)
tools
- Scissors - make sure they are SHARP for cutting your fringe. My all time fav is LDH Scissors
- Measuring tape - fabric measuring tape is easiest to use but any type of measure tape you have will work fine
- Comb and/or brush. I always use both a pet brush and combo (from the dollerstore) as you really want to make sure your fringe is brushed out so that it looks full and beautiful
- Wire cutters for cutting your faux greenery
- Glue gun
- Crafting needle with thick hole is optional if you want to add a small accent color around the hoop
getting the right cord for your macrame wreath
Now, I've been there. I know all too well the hunt for good quality 100% natural cord and I am here to tell you, it's NOT at Michaels You need to get your cord from a supplier. Many are on Etsy or you can do a quick search on Instagram. Here are some of my favourites below that all ship to US or CA.
- Unfettered Co
- Lots Of Knots Canada
- Ganxxet - this is my absolute favourite cord. Truly, premium quality and I cannot recommend it enough! You can even use my discount code MODERNKNOTS10 to save. All of the wreaths you see pictured here, are made with Ganxxet cord!
steps to making your diy macrame wreath
Step 1: Cut Your Macrame Cord to length and attach to the hoop
You will want to cut roughy 82 pieces of cord measuring 22 inches long. If you are using a larger or smaller hoop you will want to cut accordingly. You will attach each cord using a larks head knot.
Start by folding the piece of cord in half so that the two loose ends are even, forming a loop at the folded end. Hold the folded cord near the top of the metal hoop and position the loop infront of the hoop so that it rests on the front of the metal ring. Pull it down behind the metal ring.
Next, take the two loose ends of the cord and bring them backwards, threading them through the loop you created. Gently pull the loose ends downward to tighten the loop around the hoop, securing the knot in place.
Now, repeat this process with additional cords until you cover the entire hoop. Once you get going with the square knots, you will be able to know if you need more or less cord.
If you plan to add the accent color, skip to step 6 before starting as there are a few ways you can do this. One way before you start knoting, and another after!
Step 2: Start connecting the cords using the square knot
Now that your cord is all attached to your hoop you are going to use square knots working your way around the hoop.
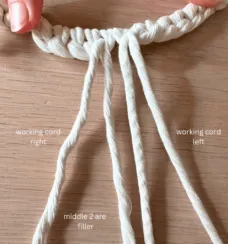
- Prepare Your Cords – Start with four strands: two outer cords (working cords) and two middle cords (filler cords). The middle cords stay in place while the outer cords do the knotting.
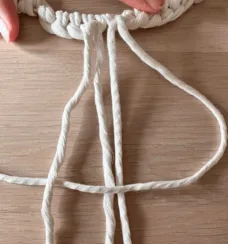
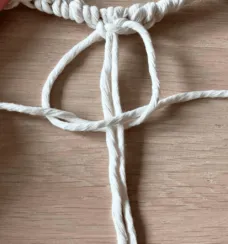
- Make the First Half of the Knot – Take the right working cord and pass it over the two middle anchor cords, forming a loop. Then, take the left working cord and place it over the tail of the right cord, pass it under the middle cords, and pull it through the loop on the right side. Gently pull both ends to tighten.
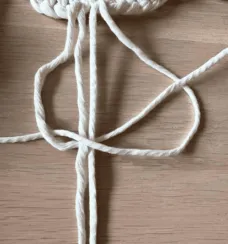
- Make the Second Half of the Knot – Now, reverse the process. Take the right working cord and pass it over the middle cords, forming a loop. Then, take the left working cord, place it over the right cord’s tail, pass it under the middle cords, and pull it through the loop on the right side. Pull both ends evenly to tighten.
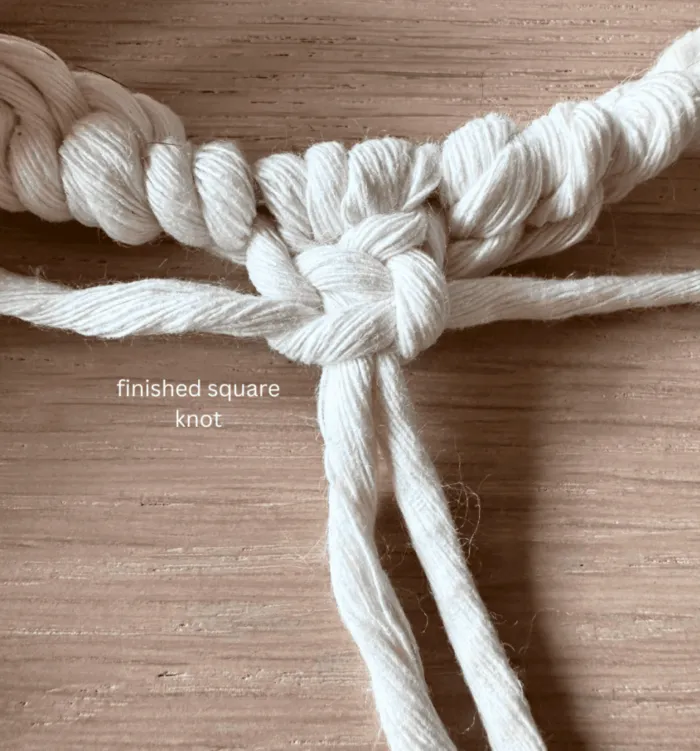
- Complete the Knot – When both halves are tied, you’ll have a square knot. Repeat this process all the way arorund the hoop, using 4 strands for each square knot.
You will see the images below are to demonstrate how to complete a square knot. Please note this demonstration is being done on a different wreath- images are just to illustrate how to make the knot!
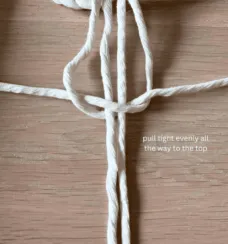
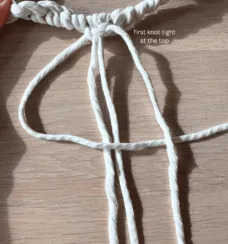
*Tip: After each square knot is complete, I pull gently on the two working cords in the middle so that they are tight and don't have a bunched or loose look to them.
Now, you will repeat this, working your way around the hoop, making square knots with 4 strands until you make it back to where you started. Once you get towards the end you will be able to gage if you should add or remove a few cords. You don't wan't it crowded, you want them to line up nicely.
Step 3: Alternate square knots to create additional rows
Once the first row is complete, we want to create additional rows to build out our wreath. Prepare for the next row by taking the outter (working cord) from two knots side by side, and consider them now your FILLER cords for this row around the hoop. This shifts the knot placement Your working cords from the last row now become your filler cords and vice versa.
Using this new grouping of four strands, tie a square knot as before—cross the left working cord over the two middle cords, pass the right cord over the tail of the left cord, under the middle cords, and through the loop on the left. Pull both ends to tighten, then repeat in reverse to complete the knot.
Continue this pattern across the row, ensuring each new knot is centered between the ones in the row above. Repeat the process, alternating the cord groupings in each row so that you have 5 rows in total. This technique creates a visually interesting net-like pattern that adds depth and texture to your macrame wreath.
Step 4: Trim and Brush the Fringe to your macrame wreath
Next, you will go around and trim the fringe slightly so that it is easier to work with. Then, you will take your brush or combo and brush out the fringe. You want to take your time here to make sure all the string is brushed out so that you have a nice full look to your wreath.
I brush with the pet on one side then flip it over and brush it out again on the other side. Then, I take the combo and do my final brush to ensure all the little strands are free from being twisted.
Once my fringe is brushed. I press down on the fringe with my hand so it is a bit more firm and then I take my SHARP scissors and trim my fringe. Then, I leave about an 1-1.5 inch of fringe. I do free-hand this but you could cut out a stencil if that feels more safe and use that to trim your fringe.
Here is a timelapse video of me brushing and trimming the fringe!
Step 5: Spray your fringe with fabric stiffener
Once your final trim is complete, I recommend laying a towel down and spray your wreath (specifically the fringe) with the fabric stiffener. I usually spray both sides twice, ensuring each layer dries in between the next. This will give you a stiffer fringe.
Step 6: Add accent color (Optional)
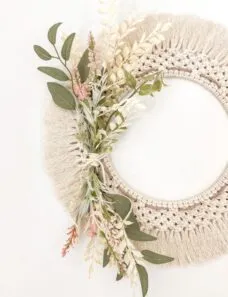
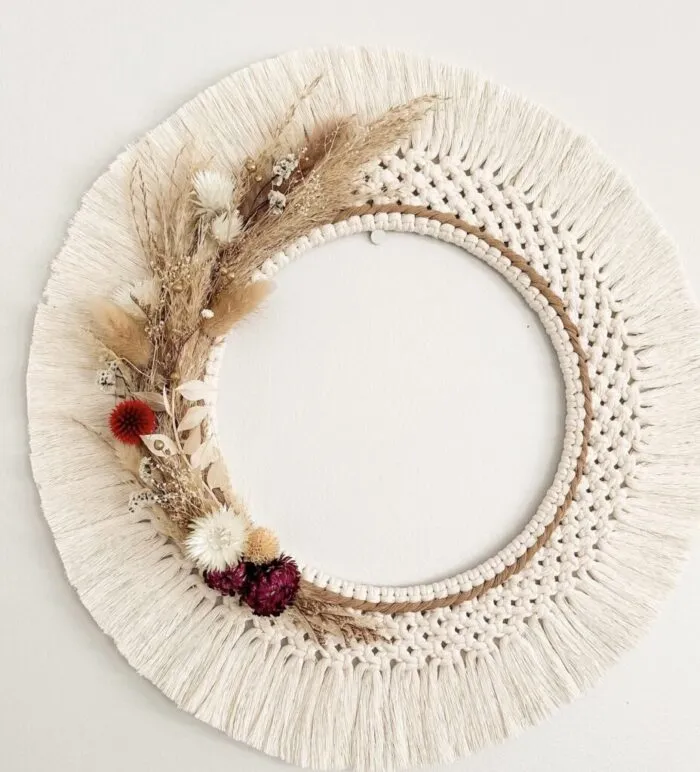
As you can see in the images above, there are three options. You can choose to have no added accent color around the hoop, or you can add it one of two ways.
option one: soumak weave (Picture 1)
If you chose to add an accent color like in the first image, You will need to add this BEFORE starting your square knots by using the Soumak Weave.
Soumak Weave: Cut a long working cord about 120 inches and secure one end near a Lark’s Head Knot. Take the working cord over the first base of cords (two strands), then bring it under and through the loop you just created. Pull it snug and repeat this process around the entire hoop, keeping your tension even. As you reach the starting point, tuck the end of the working cord behind the last few loops and secure it with a knot or weave it in for a clean finish when you are done. This technique adds beautiful texture and structure to your macramé design.
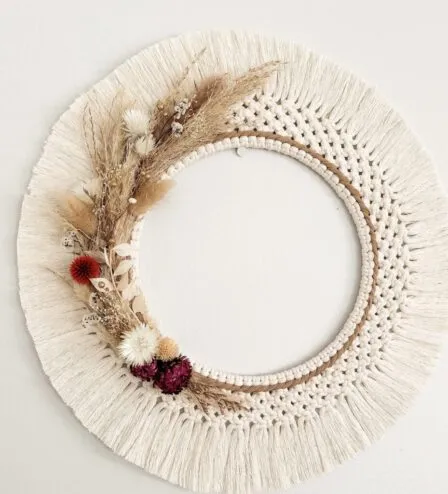
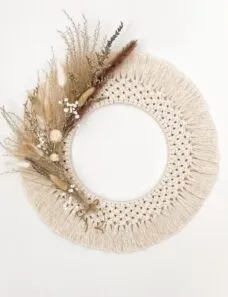
option 2: weave around square knots (picture 2)
A slightly more beginner friendly option would be adding an accent color like in image two above. If you opt for this option you will do it at the end. so come back here when you are ready for step 6.
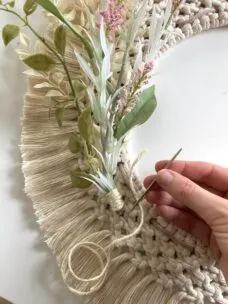
You will start by stringing your accent color cord through your crafting needle and weaving it through your first layer of square knots. Weave it in and out between the holes. Like pictured above in image two.
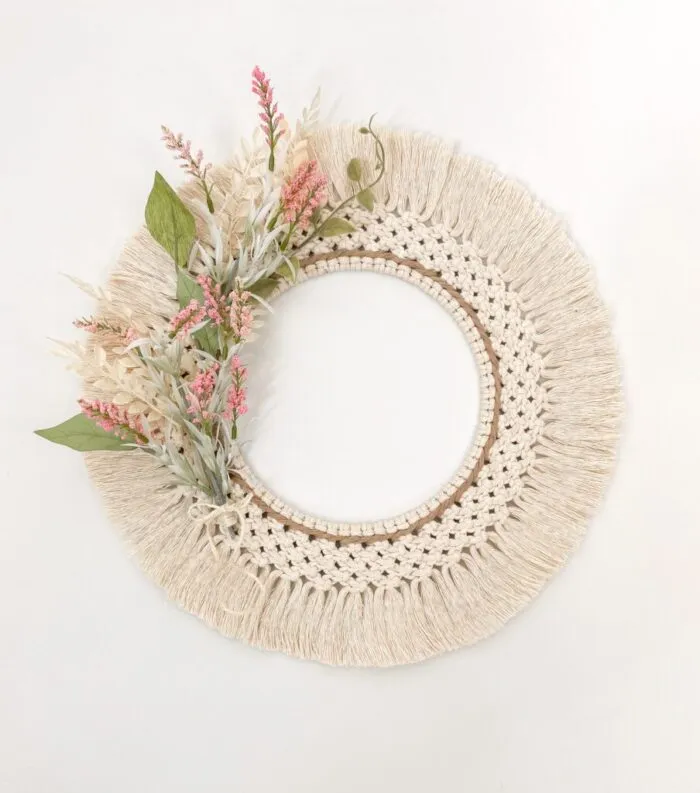
option 3: no accent color (picure 3)
If you decide you like the look of the wreath without an accent color than you can skip this step all together!
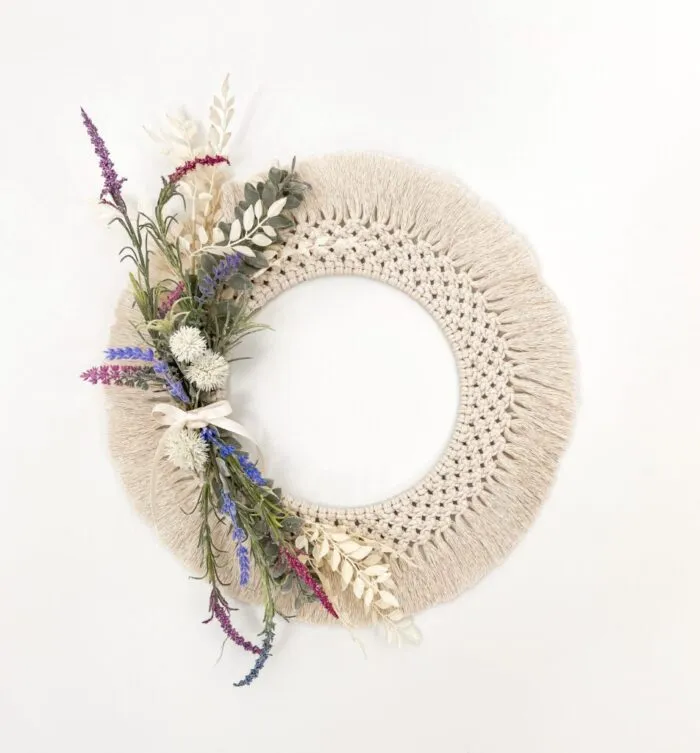
Step 7: Decorative floral
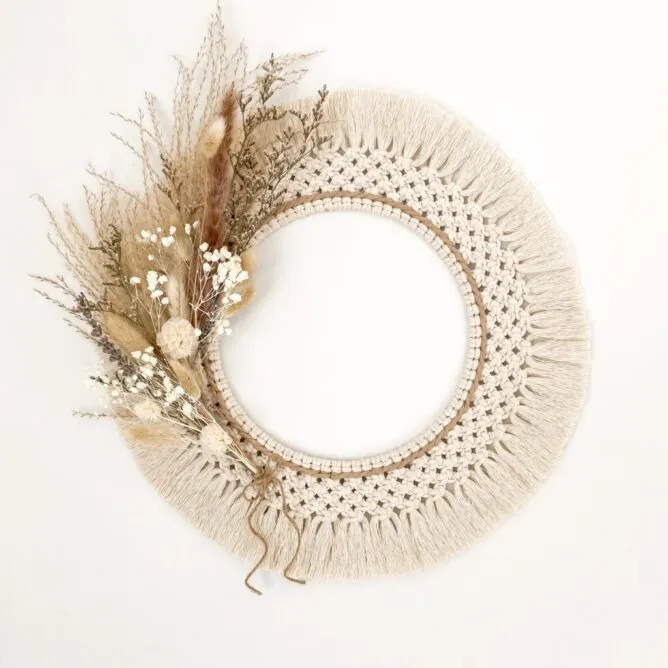
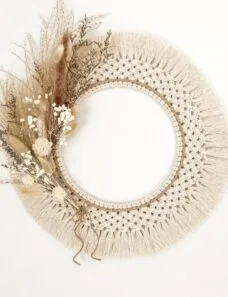
Here you will complete your floral arrangement. This is where you can really get creative and make a unique wreath! You can use faux greenery, dried floral, with a seasonal focus- the options are endless! I like to cut everything and temporarily place them to make sure I love it before gluing.
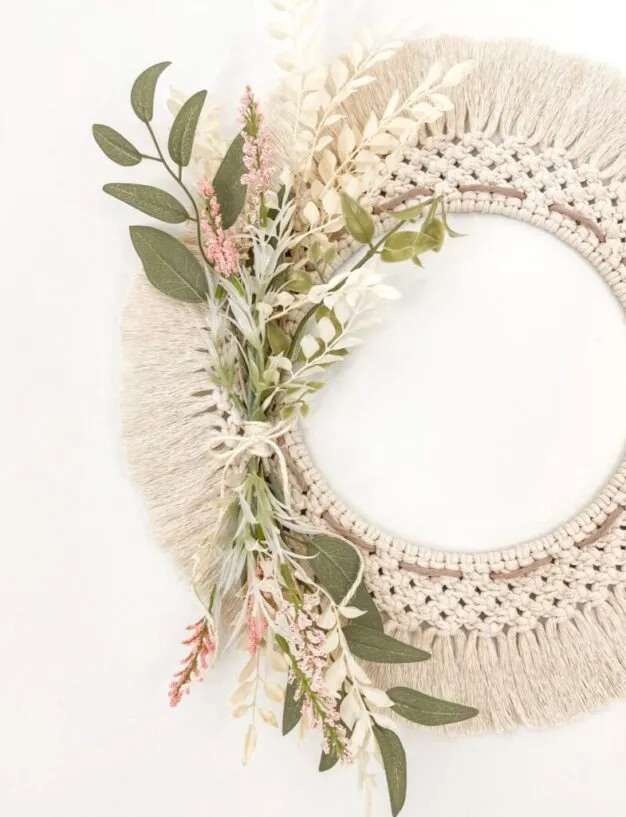
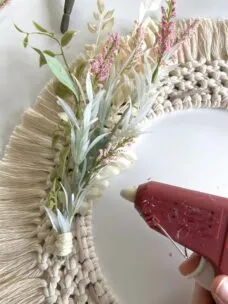
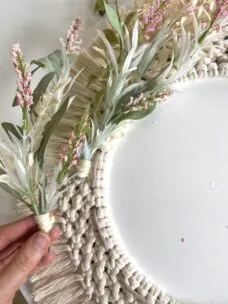
If you want your arrangement to be on the side of the wreath, I recommend making two to three small arrangements and layering them on top of each other so that you create a soft rounded look, like pictured below. You do this by placing each one on a slight angle. Sometimes I use twine to secure it to the wreath and then use the glue gun to attach the floral to the knotted section of the wreath. Remember A LITTLE GOES A LONG WAY. The glue dries white, not clear. Start small so you don't see the glue when it dries.
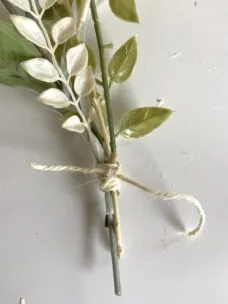

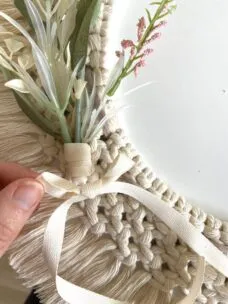
The arrangement in the front with the stems exposed, you can use twine, ribbon, or cut the head of a piece of floral and glue it to hide it. Use your creativity here, there are so many ways you can do it!
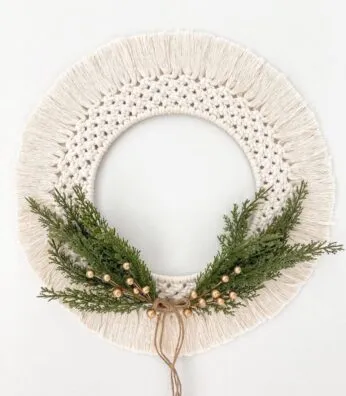
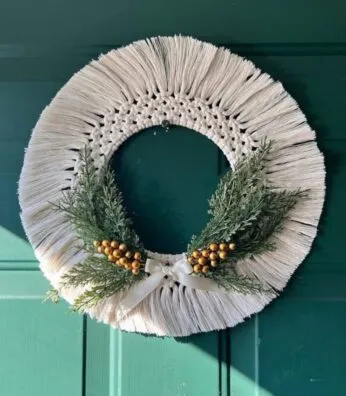
Alternatively, you could create a more centred wreath. See below more options for inspiration. These ones were for the holidays!
Here is a video of me working with dreid floral to help get an idea!
common questions: macrame wreath
What should I do if my macrame wreath looks uneven or messy?
If your knots look uneven, double-check that your cord lengths are equal and that you're pulling with consistent tension. Take your time adjusting each knot before tightening. If you notice a mistake, carefully untie the section and redo it rather than trying to force it into place.
How do I keep the macrame wreath from fraying over time?
It is natural for your wreath to look droopy or less stiff overtime, especially if it gets moved around or touched alot. It can also happen if it gets condensation. Just simply lay it on a flat surface, brush it lightly with a comb and then press your hand down on it and smooth it out into place. It should hold. If not, you will need to respray with fabric stiffener.
Can this wreath be used outdoors, or will the macramé get damaged?
Macramé made from natural fibers like cotton can absorb moisture and may not hold up well in outdoor conditions. If you plan to hang it outside, choose a covered area away from direct rain and humidity. Using synthetic cord or treating the fibers with a fabric protector can help improve durability. Overall, I recommend hanging your wreath indoors or away from humidity/condensation.
What’s the best way to clean a macrame wreath if it gets dusty?
I recommend a lint roller or a hairdryer on a cool setting to remove dust. If the macramé gets stained, spot clean it with mild soap and water, then let it air dry completely before rehanging. Avoid soaking the entire piece, as this can cause it to lose its shape.
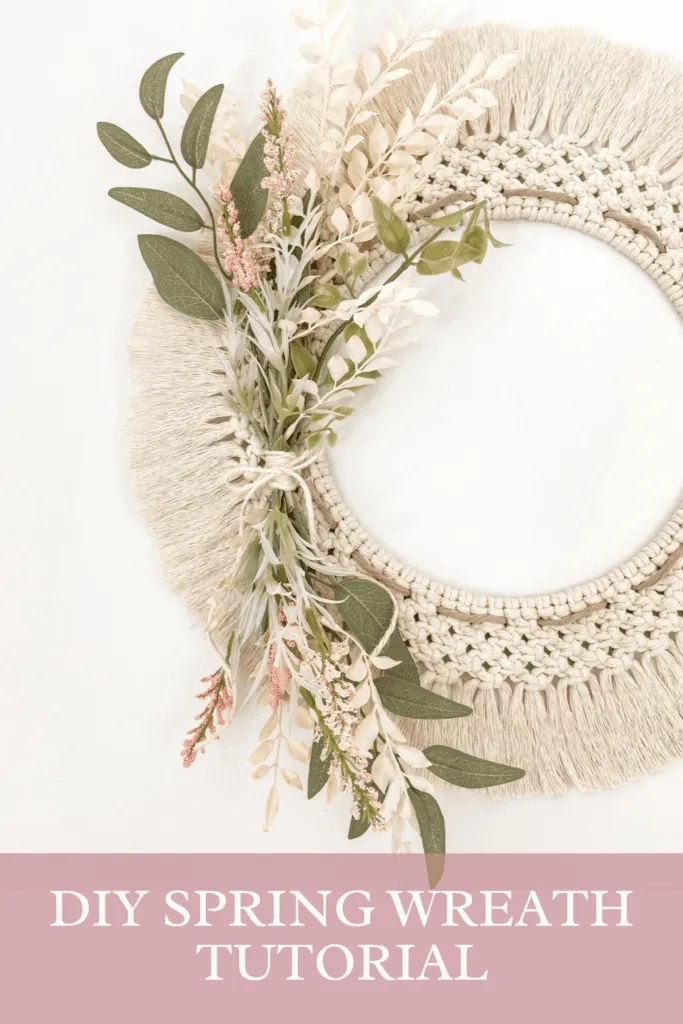
Final Thoughts: DIY macrame wreath
This DIY macrame wreath is a versatile piece that fits seamlessly into modern, boho, or organic-inspired decor. You can create a spring wreath, fall wreath, or Christmas wreath - the options are endless! Plus, it’s a fun and relaxing project that lets you play with texture and design. If you make one, I’d love to see how it turns out and please let me know if you have any questions!
If you loved this tutorial, check out my other blog post on the most ADORABLE mini macrame wreaths!
Loved this project? Let’s stay connected!
If you found this DIY guide helpful, don’t forget to save it for later by pinning it to your favorite Pinterest board! 📌 It’s the easiest way to come back when you’re ready to tackle this project.
🎉 Want more inspiration?
Sign up for my newsletter and get exclusive step-by-step guides, budget-friendly home ideas, and my favorite product recommendations delivered straight to your inbox. Plus, you’ll be the first to know about new DIY projects!