When I decided on a backyard wedding, I knew I didn’t want it to be just any backyard wedding. I envisioned something whimsical, boho, and elegant, with every detail carefully chosen to create the perfect atmosphere. A backyard wedding gave me a blank slate to design every element exactly how I wanted—including a fun and unique way to serve drinks. If you're someone who loves the idea of crafting a one-of-a-kind wedding experience, this DIY wedding bar project is for you.
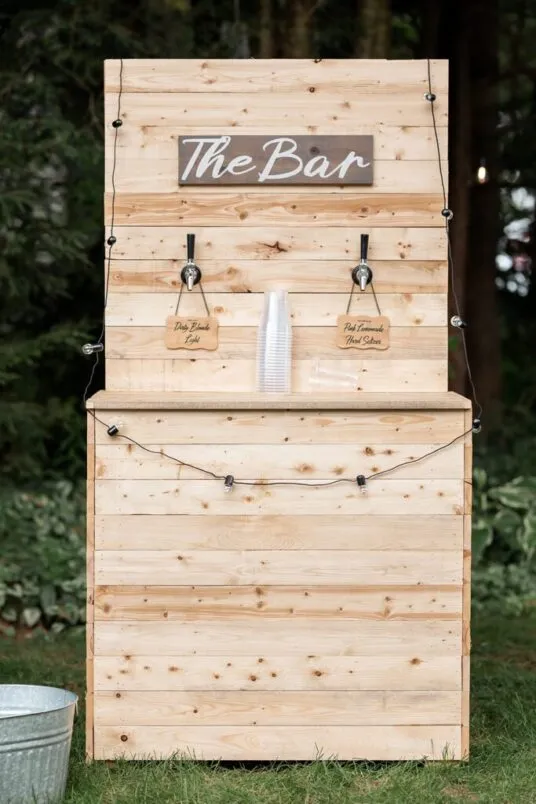
A DIY wedding bar is an easy way to serve alcohol in a way that will impress your guests and get everyone talking! It was a huge hit at our wedding. We purchased a dual keg system that allowed different pressures, so we could serve both seltzers and beer to accommodate all our guests! What I love about this bar is it can be used for a variety of events, not just a wedding! So let's get into it.
Supplies
USD links below: Some of these are affiliate links, meaning I earn a small commission if you make a purchase—at no extra cost to you. This helps support my blog and allows me to continue sharing DIY projects, home inspiration, and helpful resources. Thank you for your support!
- (7) 2x4x6 Boards
- (12) 1x4x8 Boards
- (1) 1x6x2 (Bar Sign)
- 2 3/4″ Exterior Screws
- Stain Of Your Choice
- Keg Beer Tap Kit
- Drip Trays
- Dollar Store Signs For Drink Labels
- Cricit was used for "The Bar" and drink labels
- String lights
tools
- Miter Saw
- Drill
- Level
- Measuring Tape
- Hole Saw
- Square
- Brad Nailer
- Clamps
- Sander
Shop Canadian links below! Some of these are affiliate links, meaning I earn a small commission if you make a purchase—at no extra cost to you. This helps support my blog and allows me to continue sharing DIY projects, home inspiration, and helpful resources. Thank you for your support!
Direct CAD Amazon links here
steps to creating DIY wedding bar
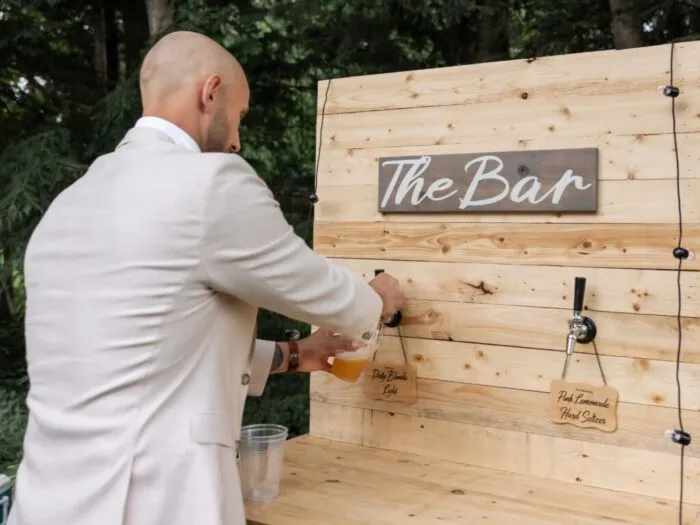
step 1: assemble the frame
First, you will measure and cut all of your wood pieces to size to create the frame using a miter saw. The 2x4s were used for the main frame, while the 1x4s were for the outer panels. I assembled the frame and then attached the 1x4s in a shiplap pattern. Here is how you will want to cut the 2x4s for the frame of the DIY wedding bar:
- 8 x 3 feet for the base
- 4 x 16 inches for the base
- 2 x 6 feet for the backing post
I laid out the 2x4s to create two sturdy rectangular bases measuring 3′ tall x 16″ wide and secured them with 2 3/4″ exterior screws. I used a square and level to make sure everything was straight before tightening the screws. To do this I used 2 3' long boards and 2 16" long boards to create each rectangle.
Next, once the main two boxes were built, I attached the remaining 4 2x4x3′ boards to the top corners & bottom corners of the rectangle using screws to attach them together to create the base of the bar. Make sure you attach them on the inside of the rectangles so that they do not distrupt your shiplap in a later step!
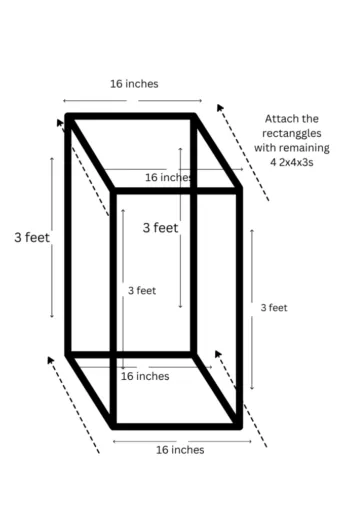
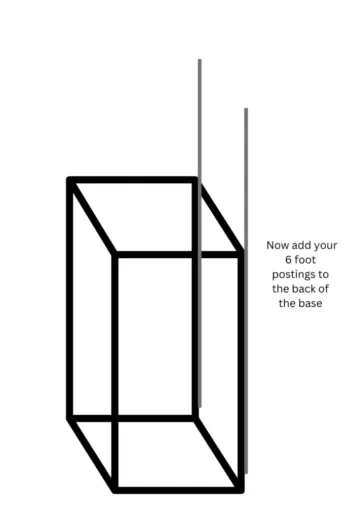
Lastly, you will take your 2 6' long pieces of wood and secure them to the back of your base for the backing post.
Use a level to ensure your base frame is level as you do not want your bar to be wobbly!
step 2: attaching the shiplap outter panel
For this step, you will cut your 1x4x8 boards accordingly to attach horizontaly to the front of the base, the sides of the base, the top (countertop section) and the backing posts that your taps will be attached to. You do not want to do the back of the bar as you will leave this section open to hold the kegs! They will sit in side.
I recommend attaching the shiplap on the SIDES first. Start by measuring from the outside edge of your base to the other side. Make your cuts and use your brad nailer to attach them. Then, measure from the edge of your shiplap to the other end on the front, make your cuts and attach your shiplap. This way when you are looking at your bar face on, the front pieces go end to end.
If you did the front first, you will see the ends from the side shiplap like I did. (see below) It does not look bad by anymeans, but I think it would look better the other way!
Then do the countertop section followed by the backing post up to the top!
step 3: drill holes for taps
Next up, you will take your hole saw and drill holes for however many tapes you want for your bar! I did two so I positioned these about 4 boards up from the countertop. I wanted to ensure room was alotted for the drip trays and room for people to hold their glass/cups under!
step 4: prep and stain
Now, depending how fancy or rustic you want your bar will depend how much prep you put into this. For me, I was going for a more rustic vibe so I did not fill the nail holes. I sanded the bar down with 220 grit sandpaper, just a quick scuff, and then stained it with a clear stain. I did not use a sealer as I was not intending to keep this outside.
You could opt to use wood filler to fill the nail holes, sand, and then stain. I recommend ensuring that you use a wood filler that is stainable and will blend well with your stain color choice!
step 5: make the signs
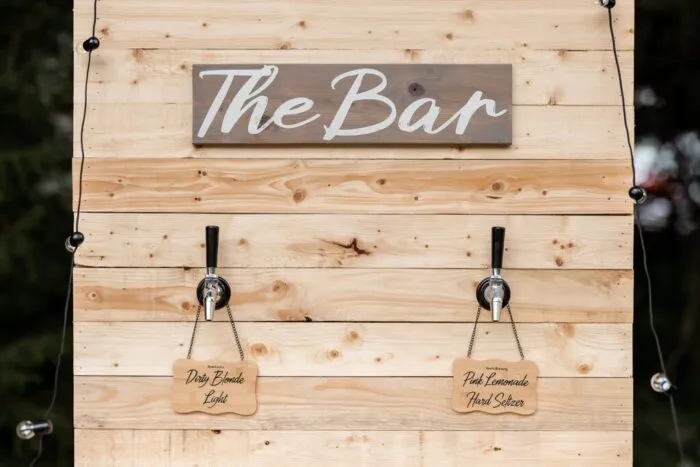
My girlfriend had a cricut machine so I had her help me with the Bar Sign. You can get creative and make this however you want! We used a 1x6x2 board, stained it to a greyish brown color and used the cricut machine to write The Bar on it. I just used two screws to attach it by screwing from the back of the bar into the sign. Make sure your screws are not too long that they will go through your sign on the other side!
You can also get creative with the liquor label signs. I just purchased two hanging wooden slates from the dollar store and used the cricut machine to put the labels on. You could also opt for a chalk board or even a picture frame with the alochol listed on it.
step 6: install the keg system for DIY wedding bar
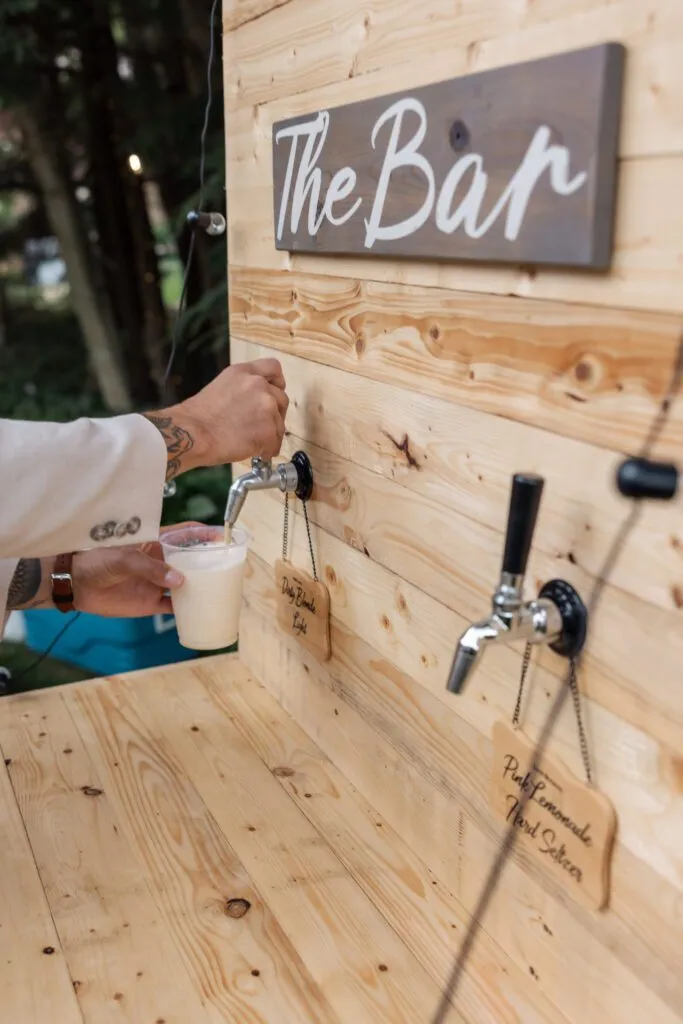
Finally, I installed the keg beer tap kit according to the manufacturer’s instructions. This involved attaching the tap components, running the tubing, and securing everything in place. After testing it with a keg, the wedding beer bar was wedding-ready!
Important to note!! If you want to offer different types of alcohol you will want dual systems to be able to set different pressures.
We used a storage bin to hold the kegs and filled them with ice to keep the alcohol cold.
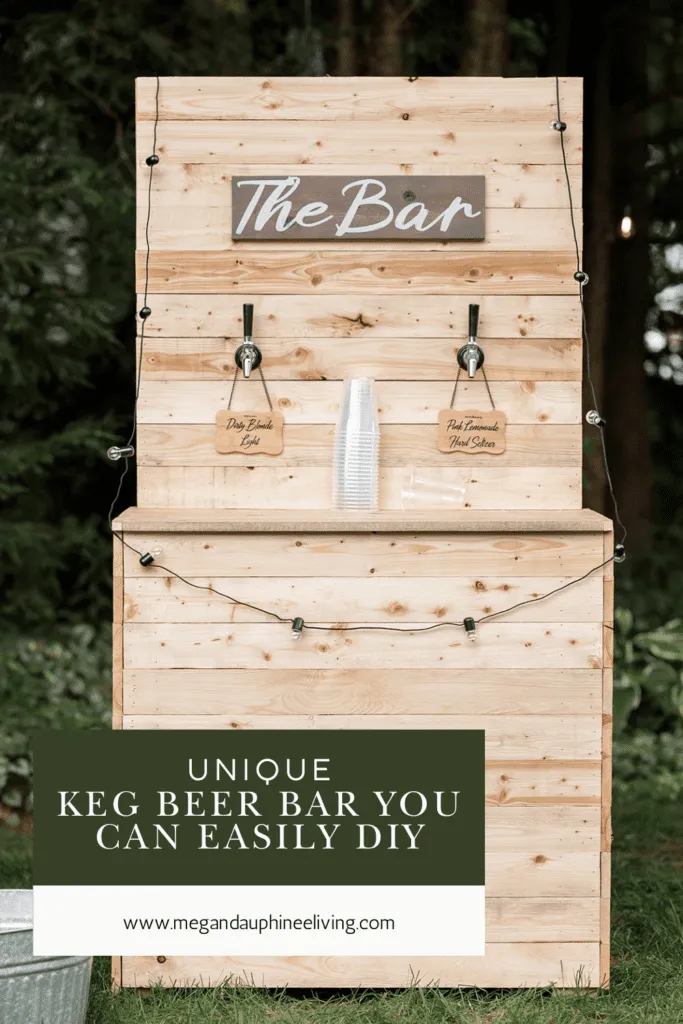
final product of diy wedding bar

This DIY wedding bar was a huge hit at our wedding! Guests loved having a self-serve option, and it added a unique, personal touch to our reception. If you're planning an event and want a cost-effective way to serve beer or other types of alcohol, I highly recommend giving this project a try!
Loved this project? Let’s stay connected! If you found this DIY guide helpful, don’t forget to save it for later by pinning it to your favorite Pinterest board! 📌 It’s the easiest way to come back when you’re ready to tackle this project.
Want more inspiration? Sign up for my newsletter and get exclusive step-by-step guides, budget-friendly home ideas, and my favorite product recommendations delivered straight to your inbox. Plus, you’ll be the first to know about new DIY projects!
You might like my other post on how to make an easy DIY textured art on canvas with a floating frame here!
