
So you are thinking about adding shiplap to your entryway.
Your entryway sets the tone for your home, but when space is limited, it can feel more like a cramped afterthought than a welcoming first impression. If you have a small, uninspired entryway—especially in a split-level home—you might be wondering how to make it both functional and stylish without a major renovation.
That’s exactly the challenge I faced, and I’m excited to share how I gave my small entryway a fresh new look with affordable, DIY-friendly upgrades. From a shiplap entryway wall to a custom closet door reface makeover with reed molding, this project proves that even the smallest spaces can be elevated with a little creativity and effort!
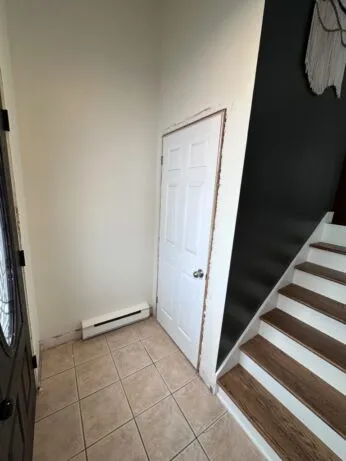
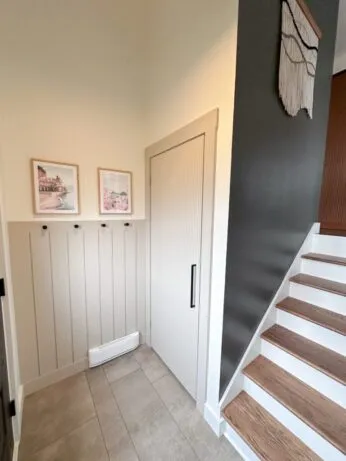
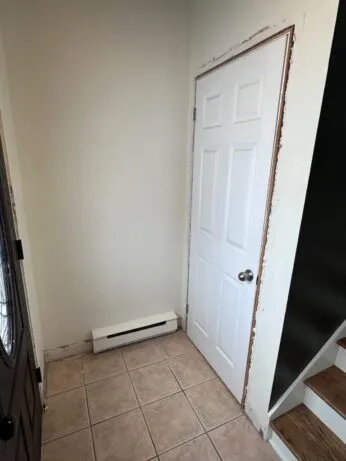
Checkout the before and after below.
If you prefer to watch my detailed YouTube video on the project you can check it out here!
tools and supplies
- 4.5 inch by 3/4 inch MDF for the baseboards
- 3.5 inch by 3/4 inch MDF for the door trim
- MDF Reed Molding
- Shiplap
- 3.5 x 1/2 inch MDF (board the hooks go into)
- Baseboard heater
- Pergo flooring color Walrus
- Hooks & Closet Pull
- Photos and frames from Poster Store
Step 1: Removing the Old Flooring and Closet Door

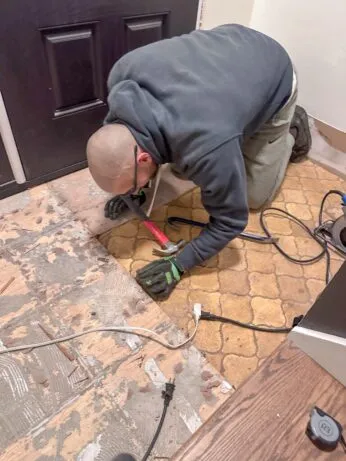
The first step was tackling the outdated flooring and completing the fluted refacing of the closet door. Ripping up the old flooring was a challenge—especially when we discovered that the subfloor had to come up, too. The closet had ugly pink carpet (yikes!), which had to go as well.
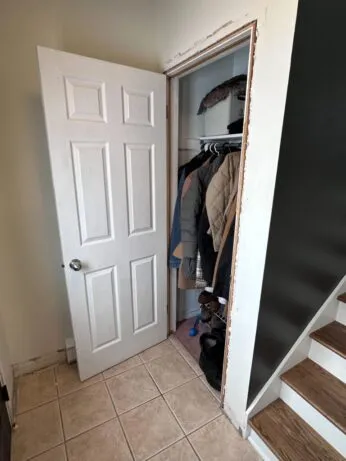
When it came to the closet door, I ran into a problem. The previous owner had cut down a door to fit the space, and I didn’t want to do the same with a new one, as I wanted it to match the interior doors throughout our home. Instead of replacing it, I opted for a budget-friendly solution: giving the existing door a facelift with reed molding also known as fluted wood panels. More on that later!
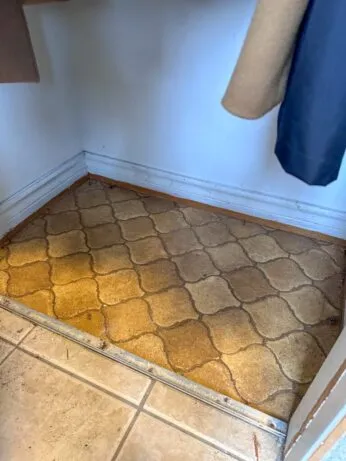
Step 2: Installing New Flooring vinyl tile flooring
Once the old flooring was out, I discovered the original vinyl cushion floor from the 70s hiding underneath. We replaced it with Pergo’s vinyl click tile in the color Walrus. This is the same flooring we installed in our kitchen and dining room, which helped create a seamless flow throughout the main level. When working with small spaces, minimizing the number of different flooring types keeps things looking cohesive.
Step 3: Adding Trim and a Shiplap Accent Wall
After the flooring was in, it was time for trim. We installed new baseboards around the room and framed out the closet and front door.
To add visual interest to an otherwise blank wall, we decided on a shiplap with coat hooks accent wall —perfect for creating a functional drop zone without taking up any extra space.
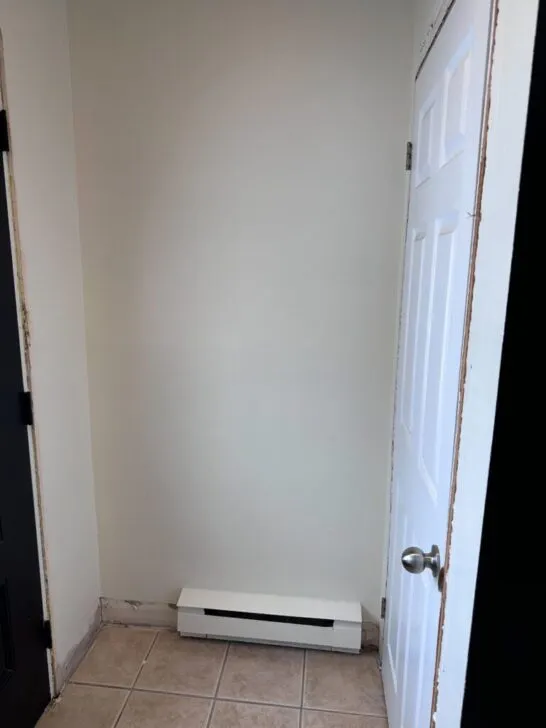
Since this wall also had a baseboard heater, we first attached the floor trim and cut a hole using a hole saw so the power cords could pass through cleanly. The heater itself was lightweight, so we secured it to the trim rather than the wall, keeping the look simple and streamlined.
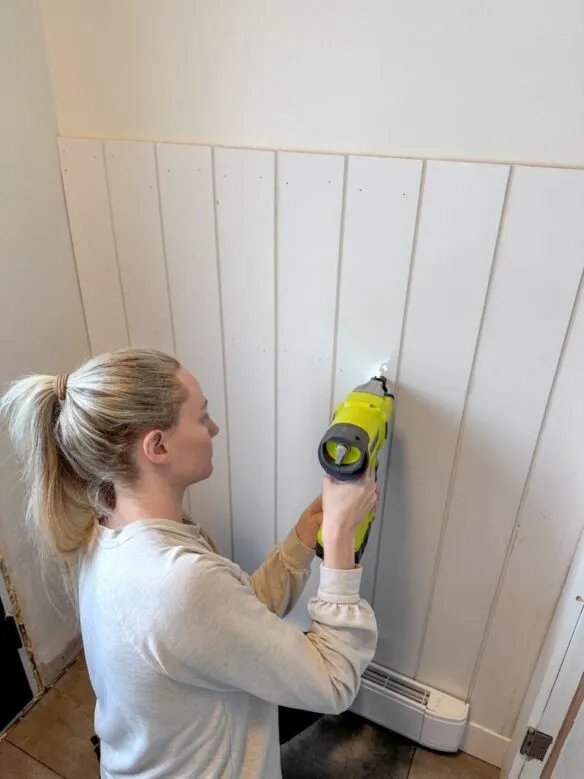
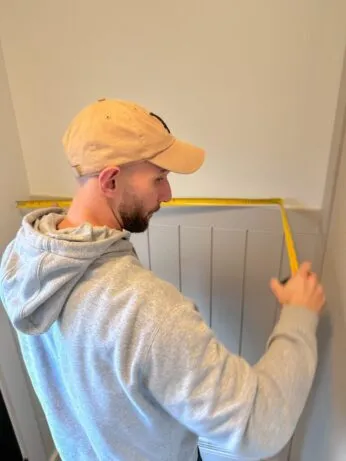
For the shiplap accent wall, we purchased five 8-foot boards and cut them in half to create 4-foot sections. This kept the cost low—only $60 CAD for all the boards! We used a piece of leftover trim from a previous board and batten project to serve as the top rail, where the hooks would be mounted.
If you are interested in learning how to create a board and batten accent wall check out my post EASY BOARD AND BATTEN WALL: EVERYTHING YOU NEED TO KNOW
Using a miter saw, we cut the boards to size and used a jigsaw to trim one slightly so everything fit perfectly.
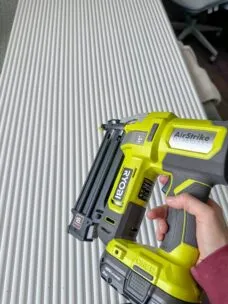
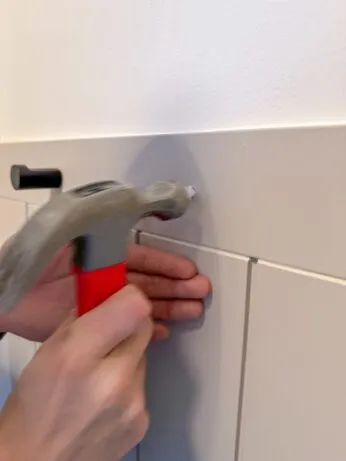
I highly recommend securing shiplap with a nail gun rather than wood glue. If you ever want to remove or update it in the future, you’ll thank yourself!
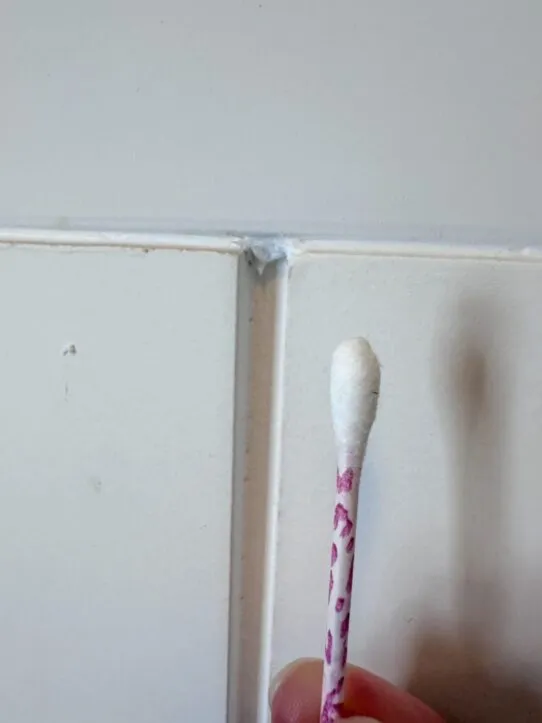
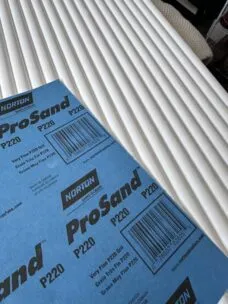
Once installed, I filled the nail holes with wood filler, sanded everything with 220-grit sandpaper, and caulked the seams. A Q-tip worked surprisingly well for getting caulk into the grooves! Just be sure to smooth it out (unlike pictured below)
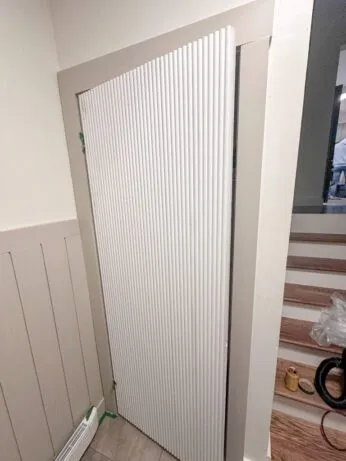
Step 4: DIY fluted Closet Door with Reed Molding (fluted wood panels)
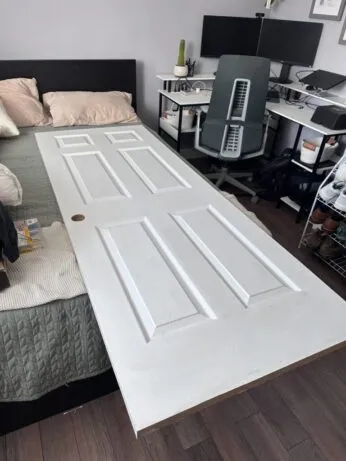
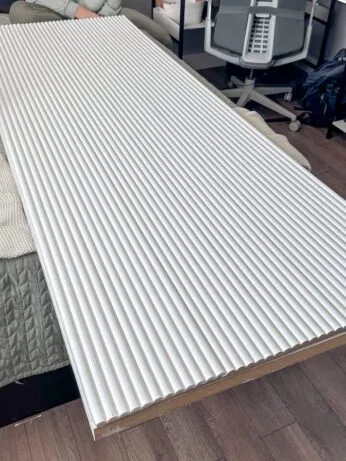
To reface the closet door for a fluted look, I purchased MDF reed molding, cut it to length, and used my jigsaw to make a custom trim piece. After sanding everything smooth with my electric sander, I attached the molding with a nail gun, filled the holes, then a quick sand over the nail hole fillings for a seamless look.

Since I wanted a more modern feel, I decided to swap out the traditional doorknob for a sleek pull handle. This meant filling in the original handle hole, as well as the latch hole in the door jamb. A little filler, sanding, and paint made those disappear completely!
Step 5: Painting and Adding Hardware to finish shiplap entryway
With the trim, shiplap, and door upgrades complete, it was time for paint. I stuck with a neutral, cohesive palette:
- Trim: Alabaster by Sherwin-Williams (matches the rest of my home)
- Walls: Dover White by Sherwin-Williams (matches the rest of main living area)
- Shiplap Wall & Closet Door: Shiitake by Sherwin-Williams (matches my hallway interior doors)
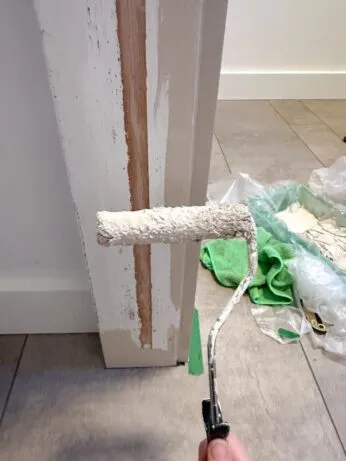
This door frame was old and the original frame from the bi-folds that used to be here a long time ago! You can see they were in rough shape, but I sanded them down with my electric sander before painting and you can't even notice!
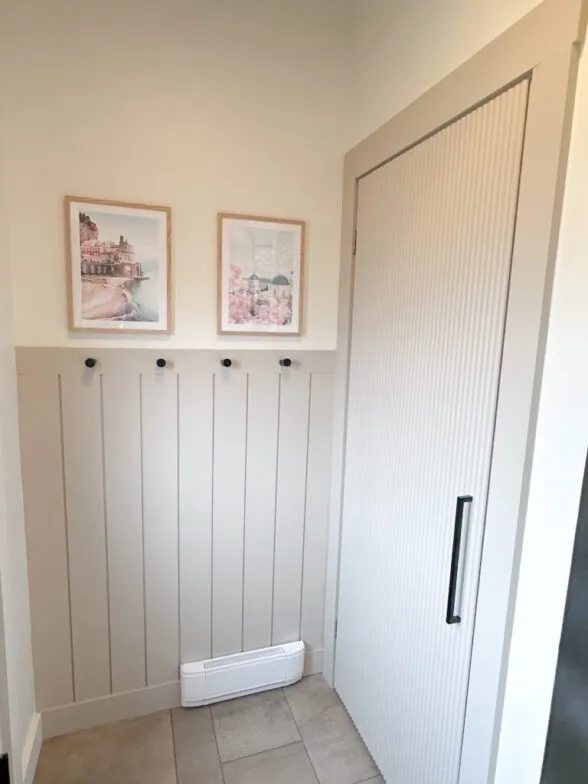
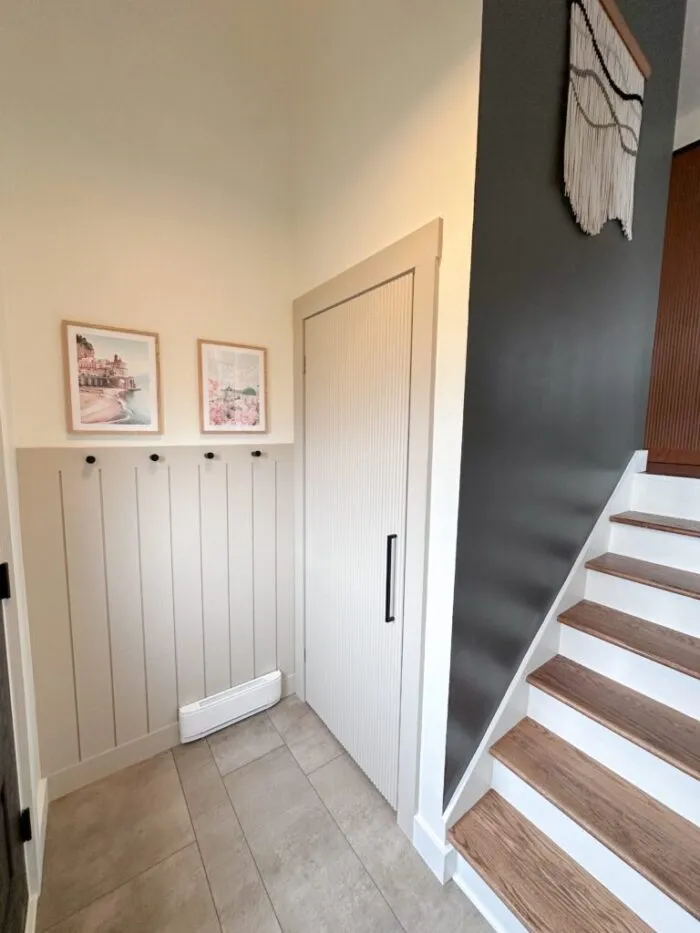
For the finishing touches, I added black hooks to the shiplap wall and a matching black handle to the closet door. To bring some personality into the space, I framed a couple of prints from our travels—one from Santorini, where we got engaged, and another from the Amalfi Coast, where we honeymooned. Incorporating meaningful decor is one of my favorite ways to make a house feel like home.
The Final Result & Future Plans
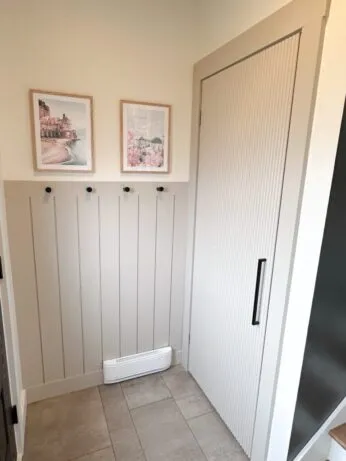
Even though this entryway is small, these updates made a world of difference. The new flooring, shiplap wall, and closet door makeover with reed molding not only improved the look of the space but also made it feel more functional and put together. I may add a small bench or stool to the adjacent wall in the future to complete the space.
And coming up next—our front door is getting a makeover with Retique It for a faux wood finish. I can’t wait to share that transformation with you soon!
Bringing It All Together: Inspiration for Your Home
If you’re feeling stuck with a small entryway, I hope this project shows you that even simple, budget-friendly updates can make a huge impact. Creating an accent wall in your entryway, refacing the closet door with reed molding, or installing a half wall with hooks can instantly make your space more functional and inviting. Every home is different, but the key is to find solutions that work for your needs while keeping things organized and visually appealing.
If you’re looking for ideas for small entryways and decide to tackle this one on your own, I’d love to see how it turns out! And if you’re looking for more ideas to spruce up your home, be sure to check out my other posts for budget-friendly inspiration.
You might like my post on how I Boosted My Curb Appeal For Less Than $500!
Loved this project? Let’s stay connected! If you found this DIY guide helpful, don’t forget to save it for later by pinning it to your favorite Pinterest board! It’s the easiest way to come back when you’re ready to tackle this project.

Want more inspiration? Sign up for my newsletter and get exclusive step-by-step guides, budget-friendly home ideas, and my favorite product recommendations delivered straight to your inbox. Plus, you’ll be the first to know about new DIY projects!
Let me know how your project turns out—I’d love to see your results!